- You are here:
- Home »
- Home Articles »
- Why Blenders Leak From the Bottom
Why Blenders Leak From the Bottom

As an Amazon Associate I earn from qualifying purchases.
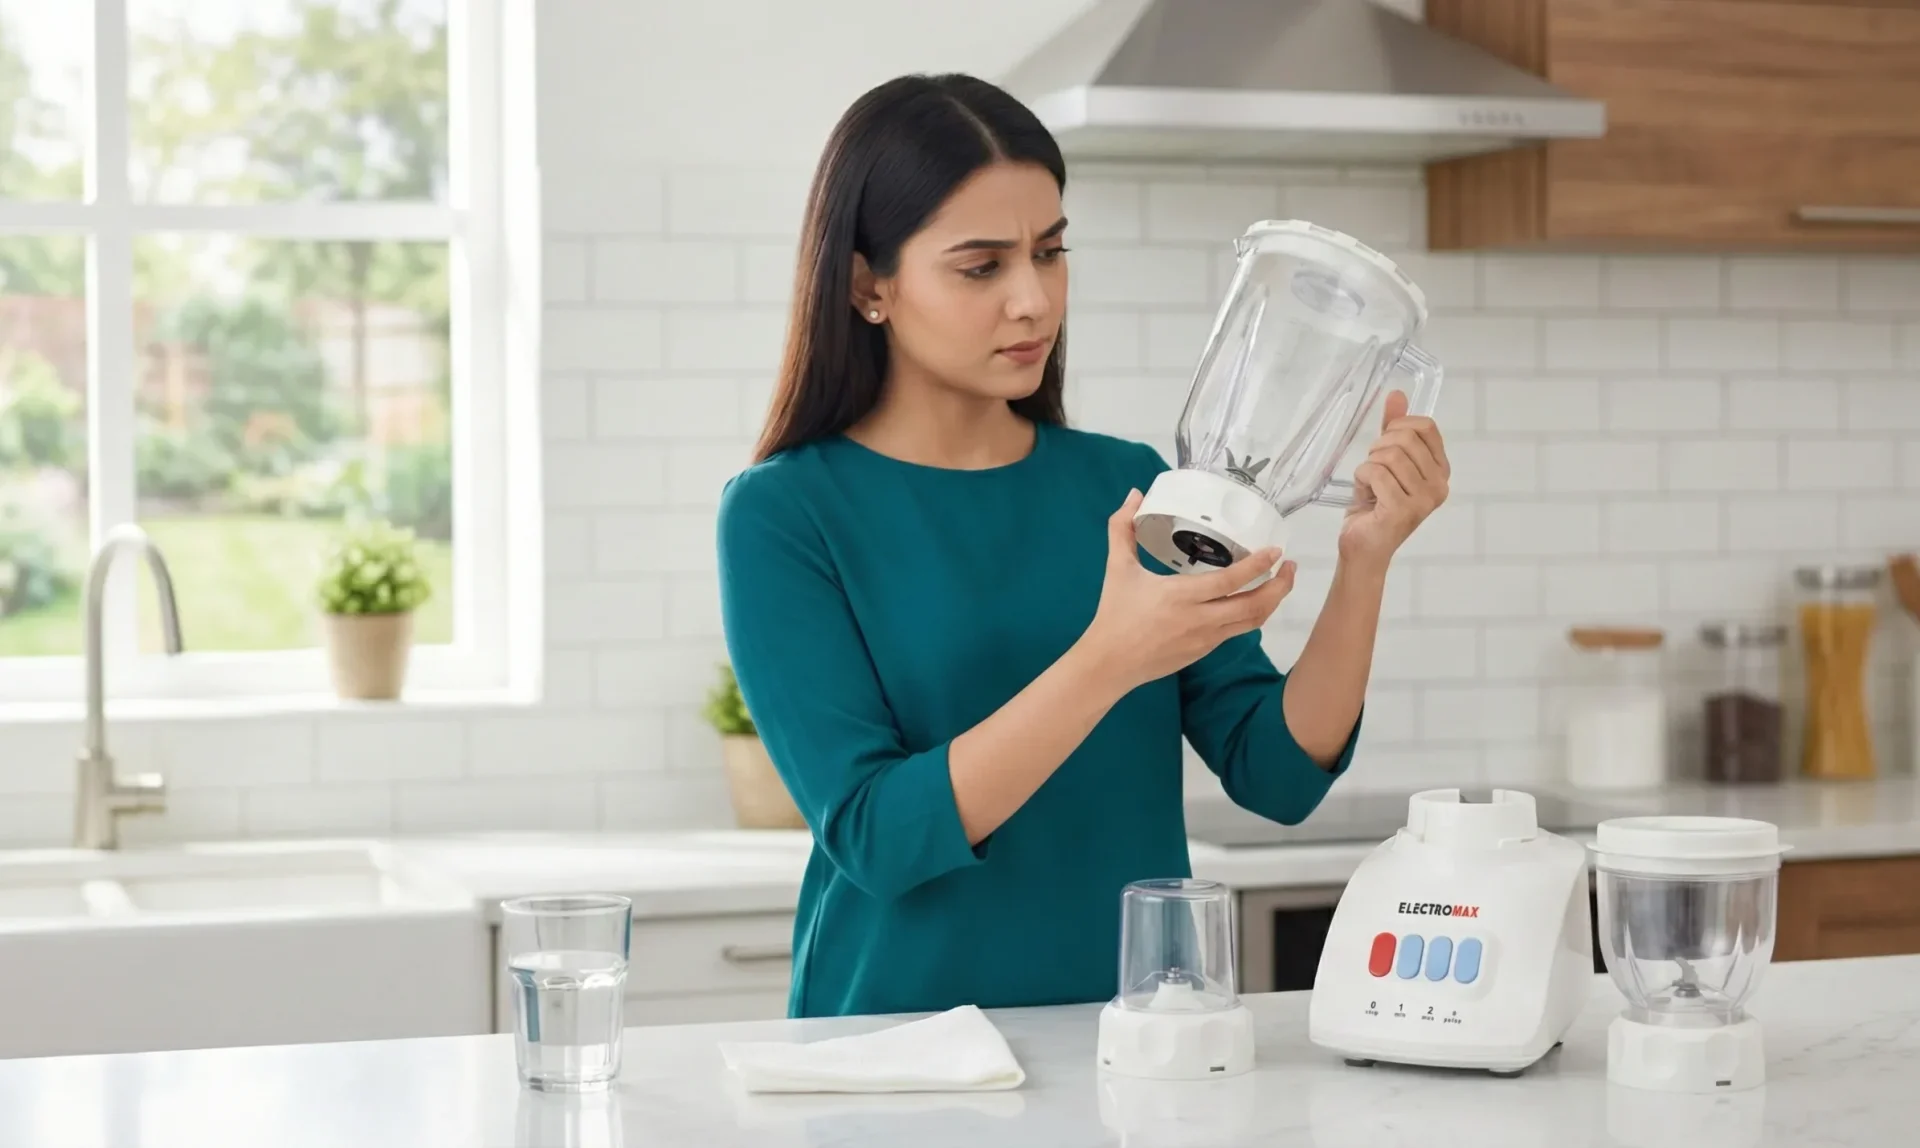
Finding liquid underneath your blender can feel alarming. Water or smoothie residue pooling at the base often raises immediate concerns about cracks, electrical damage, or whether the appliance is still safe to use.
In most cases, those fears turn out to be unnecessary. When a blender leaks from the bottom, the issue is usually mechanical and localized — not a sign that the entire appliance has failed. Understanding where the leak actually starts makes the rest of the troubleshooting far more straightforward.
In this guide
Why Blenders Leak From the Bottom
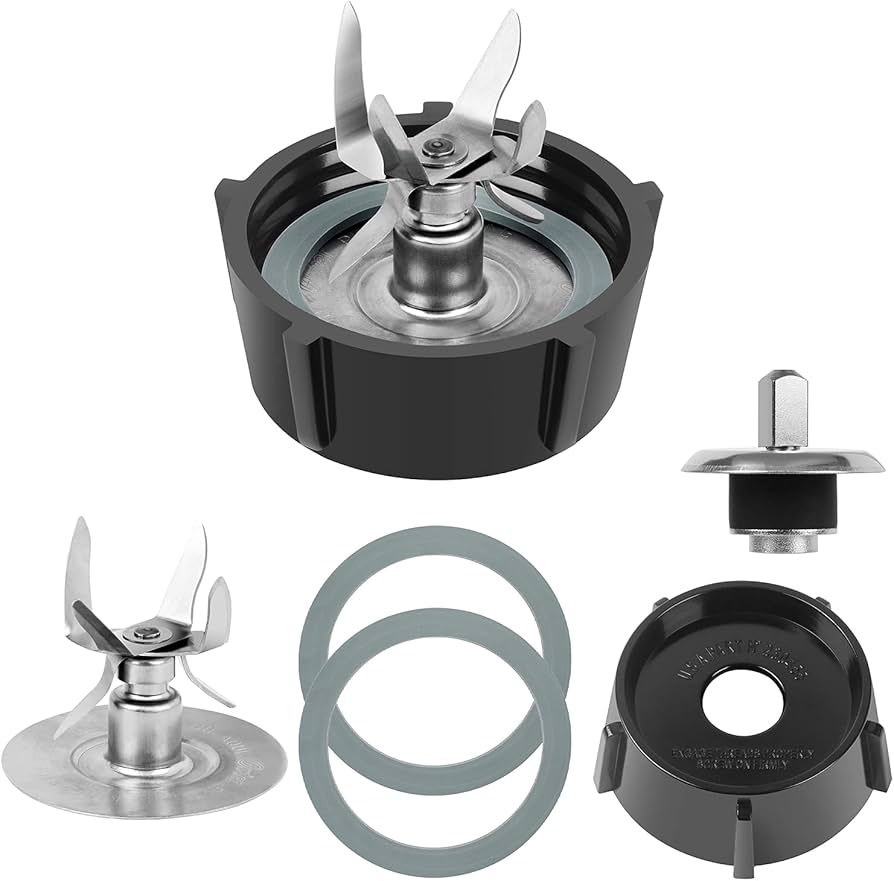
Despite how it looks, a bottom leak rarely means the blender jar itself is cracked. Modern jars are designed to handle pressure, temperature changes, and repeated use without splitting. The more vulnerable point is where multiple parts meet.
At the base of the jar, the blade assembly passes through an opening that must remain watertight during operation.
A rubber or silicone gasket sits between these components, forming a seal that tightens as ingredients press downward while blending.
When that seal is intact and seated correctly, liquid stays contained. But if the gasket can’t sit flush — because of residue, wear, or slight misalignment — liquid naturally finds its way through the smallest gap. Thin mixtures like water, milk, or oil tend to reveal the problem first.
This is why leaks often appear suddenly after cleaning or reassembly. The components may look properly aligned from the outside, while the seal underneath is slightly off. Identifying that interaction is the key to stopping the leak rather than masking it.
Common Seal and Gasket Problems
Most bottom leaks trace back to small issues that develop slowly.
The gasket and surrounding parts are exposed to moisture, pressure, and residue every time the blender runs.
Over time, even minor interference can prevent the seal from sitting as tightly as it should.
One of the most common culprits is leftover food residue. Thick blends, sticky ingredients, and fine particles can collect beneath the blade assembly where they’re easy to miss. When that buildup dries, it creates an uneven surface that stops the gasket from sealing flush.
If residue is preventing the seal from seating properly, a deeper clean is often necessary:
How to Deep Clean a Blender
How to Deep Clean a Blender
Wear is another factor. Gaskets are designed to flex slightly, but repeated tightening and loosening can cause them to stiffen, warp, or lose elasticity. Once that happens, even a perfectly clean assembly may still allow small leaks to form.
Improper reassembly can also play a role. If the blade assembly is tightened unevenly or cross-threaded, pressure won’t be distributed evenly across the seal.
From above, everything may appear secure — while underneath, a gap remains.
These issues don’t always cause dramatic leaks right away. Often, they show up only with thinner liquids or after the blender has been running for a few minutes. That subtlety is why leaks are frequently misattributed to cracks or manufacturing defects.
How to Stop a Blender From Leaking
Once you’ve confirmed the leak is coming from the bottom of the jar, the next step is slowing things down.
Rushing to tighten parts or continue blending usually makes the problem worse.
A methodical check is far more effective.
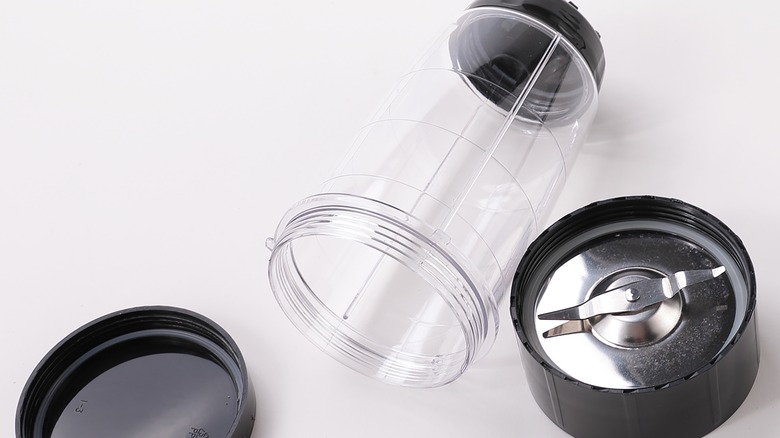
Start by unplugging the blender and fully disassembling the jar. Separate the blade assembly, gasket, and jar base so each piece can be inspected on its own. This makes it easier to spot issues that aren’t obvious when everything is still connected.

leaks usually originate where these parts connect.
Examine the gasket closely. It should feel flexible and sit flat without curling or hard edges.
If it looks misshapen, brittle, or permanently compressed, it may no longer be able to form a watertight seal.
Before reassembling, make sure all contact surfaces are completely clean and dry. Even a thin film of moisture or residue can interfere with how the gasket seats once pressure is applied.
When putting the jar back together, tighten the blade assembly evenly and firmly — but not aggressively.
Over-tightening can distort the gasket just as easily as leaving it too loose.
The goal is balanced pressure, not force.
After reassembly, test the blender with plain water before adding food. Run it briefly and check underneath for any signs of moisture. If the base stays dry during this test, the seal has likely been restored.
If leaking continues despite careful reassembly, that usually points to a worn gasket rather than a cleaning or alignment issue.
At that stage, continued tightening rarely helps and can accelerate further wear.
Storage and Handling Mistakes
Even after a leak is fixed, it can quietly return if the blender is stored or handled poorly. Seals are designed to sit flat and maintain even pressure. Anything that distorts that shape over time makes leaks more likely.
One common issue is storing the blender jar upside down while it’s still damp. Moisture trapped around the gasket can soften the material or encourage residue to settle in places that are hard to see. Over time, that affects how well the seal seats during use.
Stacking heavy items on top of the jar can also cause problems. The added weight presses unevenly on the blade assembly and gasket, gradually warping them. This is especially common in crowded cabinets where appliances are packed tightly together.
Avoid storing blender jars tilted, stacked under heavy cookware, or left wet after washing.
These habits can distort the gasket and lead to recurring bottom leaks over time.
These habits can distort the gasket and lead to recurring bottom leaks over time.
Another subtle issue comes from leaving the blade assembly tightly attached during long periods of storage. Constant pressure can compress the gasket permanently, reducing its ability to rebound and form a tight seal later.
If cabinet space is limited, storing appliances thoughtfully makes a noticeable difference. Simple adjustments — like keeping jars upright, separating heavy items, and allowing parts to dry fully — can extend the life of seals and prevent repeat leaks. For practical ideas, this guide on storing kitchen appliances smartly offers space-saving approaches that are gentler on appliance components.
Preventing Future Leaks
Once a bottom leak has been resolved, keeping it from returning comes down to a few small habits. Seals fail gradually, not suddenly, and most repeat leaks are the result of subtle stress over time rather than a single mistake.
One of the simplest preventative steps is rinsing the blade assembly immediately after blending. This prevents residue from drying beneath the gasket, where it’s harder to spot and more likely to interfere with sealing later. Even a quick rinse can make a meaningful difference.
When reassembling the jar, tighten the blade assembly only until it feels snug.
If you need to strain or force it, the gasket is likely being compressed too much.
Gentle, even pressure keeps the seal flexible longer.
If you need to strain or force it, the gasket is likely being compressed too much.
Gentle, even pressure keeps the seal flexible longer.
Temperature changes also matter. Exposing the gasket to very hot water followed by cold ingredients can accelerate wear. Allowing parts to cool slightly before washing and avoiding extreme temperature swings helps preserve elasticity.
Routine checks go a long way as well. Taking a moment every few weeks to inspect the gasket for flattening or stiffness can catch problems early. Simple maintenance habits like these are covered in more detail in blender maintenance tips, which focuses on extending appliance life rather than reacting to failures.
Preventative care doesn’t need to be time-consuming. A few mindful steps during everyday use often make the difference between a blender that leaks repeatedly and one that stays reliable for years.
Frequently Asked Questions
Is it safe to keep using a blender that leaks from the bottom?
No. If liquid is leaking underneath the jar, continued use can allow moisture to reach internal components.
Always unplug the blender and address the leak before using it again.
Does a bottom leak mean the blender jar is cracked?
In most cases, no. Bottom leaks usually come from the gasket or blade assembly rather than the jar itself.
Cracks are far less common than sealing issues.
Can over-tightening cause a blender to leak?
Yes. Over-tightening can compress or warp the gasket, preventing it from sealing evenly.
The blade assembly should be snug, not forced.
How often should blender gaskets be replaced?
That depends on usage, but frequent blending or exposure to heat can shorten gasket life.
If leaks persist after cleaning and proper assembly, replacement is often the best solution.
Why does my blender only leak with thin liquids?
Thin liquids like water or milk escape through small gaps more easily than thick blends.
If a seal is slightly misaligned or worn, thinner liquids usually reveal the problem first.
Amazon and the Amazon logo are trademarks of Amazon.com, Inc, or its affiliates.
