- You are here:
- Home »
- Home Articles »
- How to Fix a Coffee Maker That Won’t Brew
How to Fix a Coffee Maker That Won’t Brew

As an Amazon Associate I earn from qualifying purchases.
If your coffee maker turns on but refuses to brew, you’re dealing with one of the most common kitchen appliance frustrations. Whether you rely on your coffee machine every morning or only brew occasionally, a sudden brewing failure can feel like a major inconvenience—especially when everything appears to be working.
In most cases, this issue isn’t caused by a serious mechanical failure. Problems like clogged filters, mineral buildup from hard water, misaligned water reservoirs, or simple electronic glitches can stop brewing without warning. The good news is that many of these issues can be fixed at home using basic cleaning and troubleshooting steps.
This guide walks you through practical, step-by-step fixes to help restore normal brewing without calling a technician or replacing your machine prematurely. These solutions apply to most household coffee makers, including drip machines and compact countertop models.
In this guide
This troubleshooting guide is based on common household coffee makers and general maintenance practices. Results may vary depending on model and usage.
Before You Start Troubleshooting
Before diving into repairs or deep cleaning, take a moment to check a few basics. Make sure the coffee maker is plugged directly into a working outlet and that no error lights or warning indicators are active. If your machine has programmable settings, confirm it isn’t stuck in a delayed brew or standby mode.
It’s also helpful to identify whether the machine stopped brewing suddenly or gradually slowed down over time. Sudden failures often point to electronic or seating issues, while slow brewing usually indicates mineral buildup or clogs.
What You’ll Need
Before you start troubleshooting your coffee maker, gather a few basic items. You likely already have most of these at home.
- Fresh water
- White vinegar (for descaling)
- A soft cloth or sponge
- Paper filters or reusable filter (if applicable)
- Access to a sink
Once you have these ready, you can move on to the step-by-step fixes below, starting with the most common causes of brewing failure.
Step-by-Step Fixes for a Coffee Maker That Won’t Brew
Follow these steps in order, starting with the simplest checks. Many coffee makers begin working again after the first few fixes, so there’s no need to rush through all of them at once.
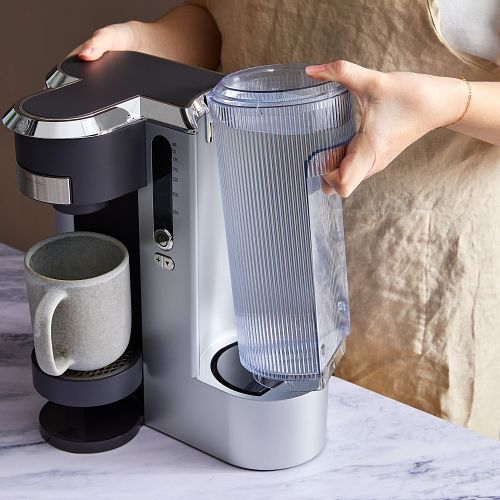
Step 1: Check the Water Reservoir
If the water reservoir isn’t properly seated, the coffee maker may turn on without pulling any water. Even a slightly misaligned tank can trigger sensors that prevent brewing.
Remove the reservoir, rinse it, refill it with fresh water, and firmly reinsert it. Make sure it clicks or sits flush against the machine, depending on your model.
If your coffee maker uses internal sensors, trapped air bubbles in the reservoir can also block water flow. Gently shaking the tank after refilling can help release trapped air.
Step 2: Clean the Filter Basket and Coffee Grounds
Used coffee grounds, especially from dark or oily roasts, can clog filter baskets and slow water flow. Over time, residue builds up even if the basket looks clean.
Remove the filter basket and discard any old grounds. Rinse it thoroughly under warm water and gently scrub mesh filters to clear trapped oils and debris.
Paper filters should be replaced regularly, as reusing them can cause blockages that stop brewing entirely.
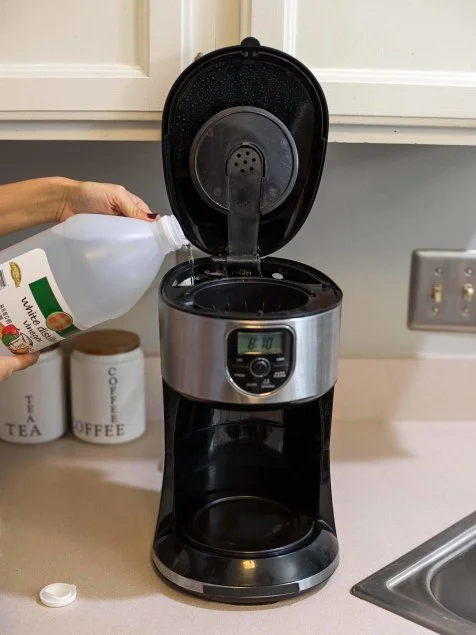
Step 3: Descale the Coffee Maker
Mineral deposits from hard water are one of the most common reasons coffee makers stop brewing. These deposits narrow internal tubing and reduce water pressure.
Fill the reservoir with a white vinegar and water solution, following your manufacturer’s instructions. Run a full brewing cycle without coffee grounds, then flush the machine by running one or two cycles with clean water.
If your machine hasn’t been descaled in months, you may need to repeat the process to fully restore normal flow.
Step 4: Check the Drip Mechanism
If water reaches the filter basket slowly or inconsistently, the drip valve may be stuck. This small component controls water release during brewing.
Inspect the area beneath the filter basket and gently clear debris using a soft cloth or toothpick. Avoid using force, as internal parts can be fragile.
Step 5: Reset or Power-Cycle the Coffee Maker
Electronic glitches can occasionally prevent brewing even when everything else appears fine. Resetting the machine often clears these issues.
Unplug the coffee maker for at least five minutes, then plug it back in and attempt to brew again. This simple step can resolve sensor or control panel errors.
Common Mistakes to Avoid
Even small habits can cause brewing problems over time. Avoid these common mistakes to keep your coffee maker running smoothly.
- Using old or stale coffee grounds: Old grounds can compact and clog the filter, restricting water flow.
- Overfilling the water reservoir: Filling past the max line can interfere with proper brewing pressure.
- Skipping regular descaling: Mineral buildup is one of the top reasons coffee makers stop brewing.
- Ignoring small leaks or slow drips: These often signal clogs that worsen if left untreated.
Maintenance and Prevention Tips
Once your coffee maker is brewing again, a few simple maintenance habits can help prevent future problems and extend the life of your machine.
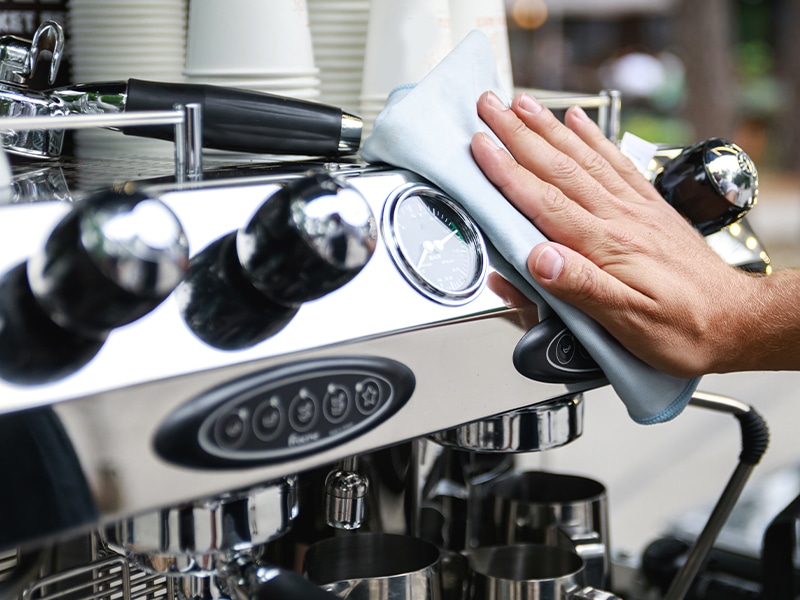
Clean after regular use: Rinse the filter basket and carafe daily to prevent residue buildup. Wipe down exterior surfaces to keep buttons and vents free of grime.
Descale consistently: If you live in a hard-water area, descaling every four to six weeks can prevent mineral buildup. For a natural approach, follow our guide on how to descale a coffee maker naturally.
Keep your counter organized: Crowded counters can lead to accidental spills or blocked vents. Learning how to organize small kitchen counter space can help protect appliances and improve workflow.
With regular care and quick troubleshooting, most coffee makers can deliver reliable brewing for years without professional repairs.
Signs Your Coffee Maker May Be Beyond Repair
While most brewing issues are easy to fix, some problems signal that a coffee maker may be nearing the end of its lifespan. Persistent leaks, failure to heat water, or burning smells can indicate internal damage that cleaning won’t resolve.
If your coffee maker is more than five to seven years old and requires frequent repairs, replacement may be the more practical option. In many cases, newer machines offer better efficiency, safety features, and more consistent brewing performance.
When repair costs approach the price of a new unit, investing in a replacement often saves time, money, and frustration in the long run.
Frequently Asked Questions
Why does my coffee maker turn on but not brew?
This usually happens when water flow is blocked. Common causes include a misaligned water reservoir, clogged filter basket, or mineral buildup inside the machine. Some models also prevent brewing if internal sensors don’t detect proper water pressure or temperature.
Can a clogged coffee maker be fixed at home?
Yes. Most clogs can be fixed by cleaning the filter basket, removing coffee residue, and descaling the machine with white vinegar. These steps restore water flow and improve brewing performance in most cases.
How often should I descale my coffee maker?
In hard-water areas, descaling every four to six weeks helps prevent mineral buildup. In softer-water regions, descaling every two to three months is usually sufficient.
What if my coffee maker still won’t brew after cleaning?
If cleaning and resetting don’t work, the issue may involve internal pumps, heating elements, or electronics. At that point, professional repair or replacement may be necessary.
Is it better to repair or replace a coffee maker?
Repair may be worthwhile for newer or high-end machines. For older or entry-level models, replacement is often more cost-effective, especially if repairs are frequent.
Regular cleaning and simple maintenance can prevent most coffee maker brewing problems before they start.
Amazon and the Amazon logo are trademarks of Amazon.com, Inc, or its affiliates.